Never Miss a Beat: Get a snapshot of the issues affecting the IT industry straight to your inbox.
Video from multiple codecs can clash when edited together. Here's how to avoid that problem.
5 Min Read

If you're working with multiple file formats for video post-production, you might have experienced what looks like bizarre Adobe After Effects-style imagery, without ever using After Effects. That's called a dirty cut.
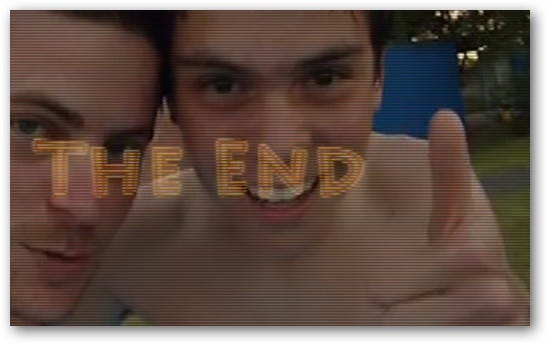
With film it was never a problem, but digital has created new challenges for movie makers. The software (iMovie, Adobe Premiere, Final Cut Pro, or Avid Media Composer, for example) doesn't understand how to render footage from multiple codecs with clean cuts. (An example of a dirty cut effect is shown below, lasting for 24 frames.)
If you want to fix this problem, here's a step-by-step approach.
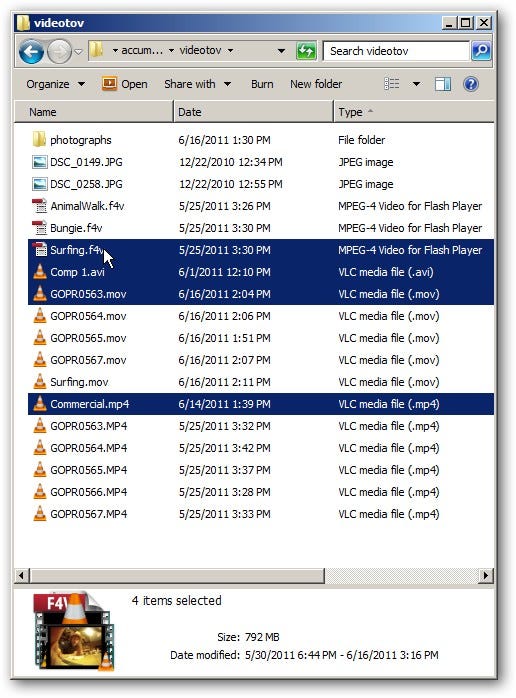
First, collect all of your assets in one location. Copy the files from your camera to the drive you wish to edit on. External drives are great because they're portable and expandable; but are much slower to work with. I recommend keeping an offsite backup copy (iCloud, Amazon Cloud Drive, etc.) should anything happen to the assets in your editing environment. This is especially true if you're going to capture the footage, or if you're going to delete the originals from the memory card you retrieved them from.
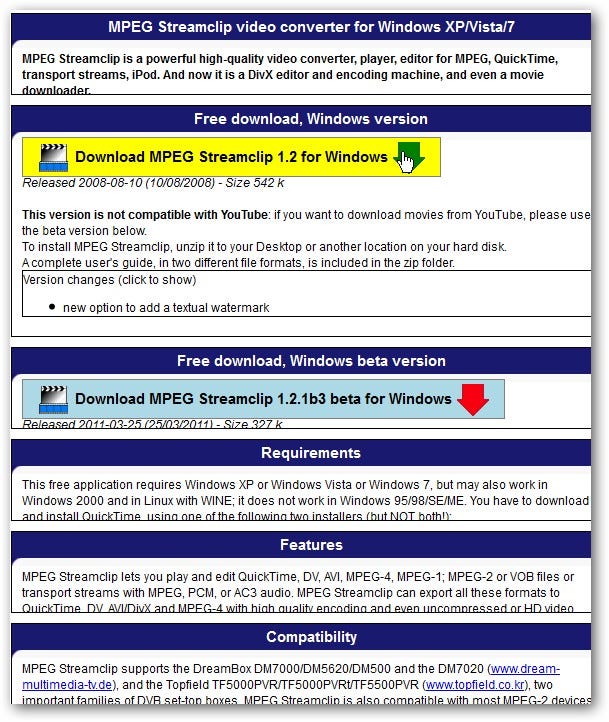
Once you've got all of the files into a folder on your file system/operating system of choice, download an open source program called MPEG Streamclip. It's a useful, free utility that can handle video conversion between most any formats.
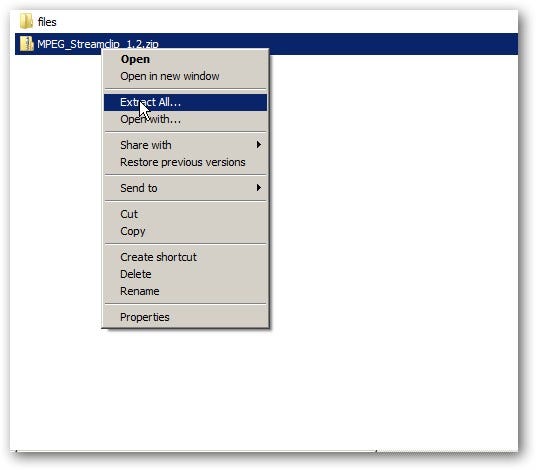
From your downloads folder, extract the files to C:/Program Files/MPEGStreamClip folder. If you're using WinZip or a similar tool, make sure to check the box "show extracted files when complete."
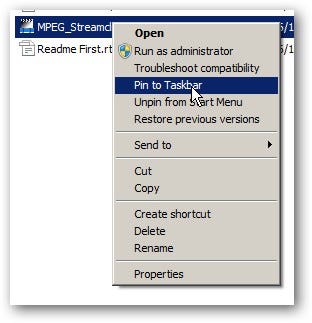
Once it's finished unzipping, right-click the MPEG_Streamclip.exe application file and pin it to the Start menu, quick launch menu, or desktop.
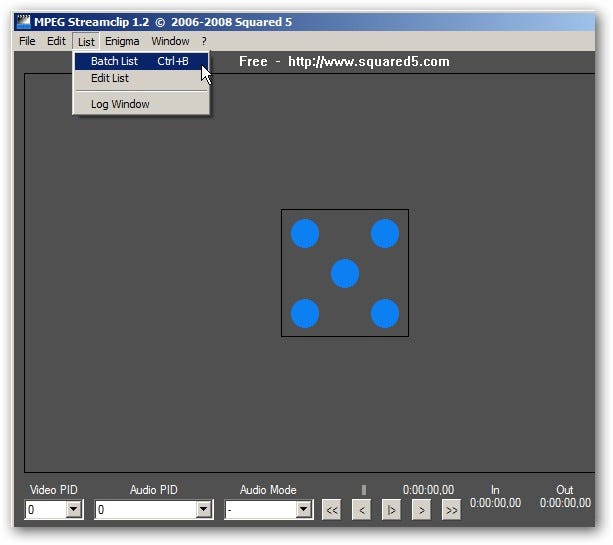
Run the program. From the program's main menu, select List--Batch List, or press Ctrl-B.
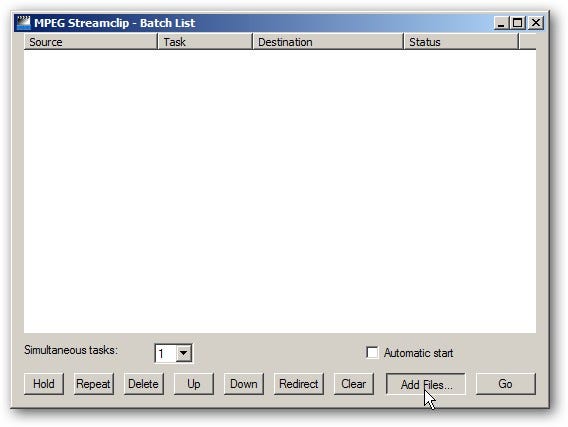
Select "Add Files" and add the files from the directory where the footage is located.
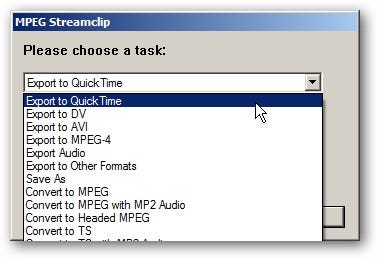
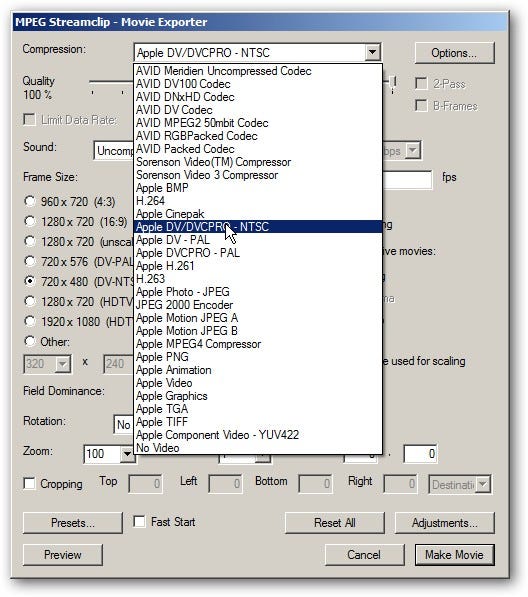
Next, click "Go" and select "Encode to QuickTime." QuickTime is a versatile format that Avid Media Composer, Adobe Premiere, Final Cut Pro, iMovie, and most other editing applications can easily read. Select a destination folder--again for speed, use a drive that's local, but an external drive is fine if capacity is a concern.
For editing, select "Apple DV/DVCPRO."
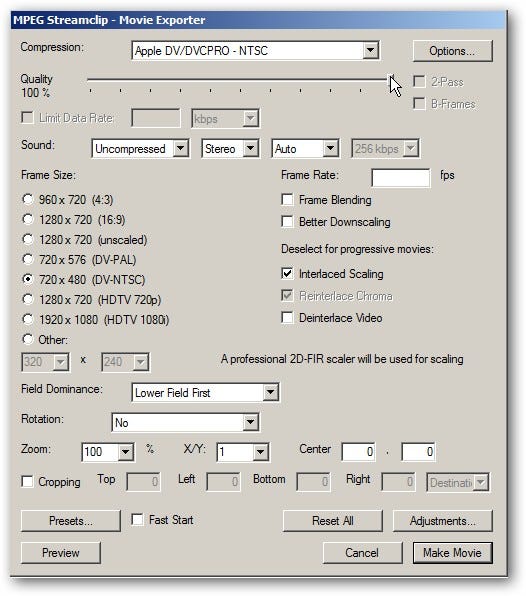
Ensure the quality is set to 100 and the size close to the original's aspect ratio. 720 x 480 is recommended for those using NTSC.
Encoding movies can take a while and uses a large amount of system resources. The length of time needed will vary dramatically, depending on the quality of the input file and your machine's technical specifications.

Once done, launch your video editing program. I've used Adobe Premiere for this walk-through, since it's one of the most versatile, easiest, and cheapest Windows programs for working across multiple file formats.
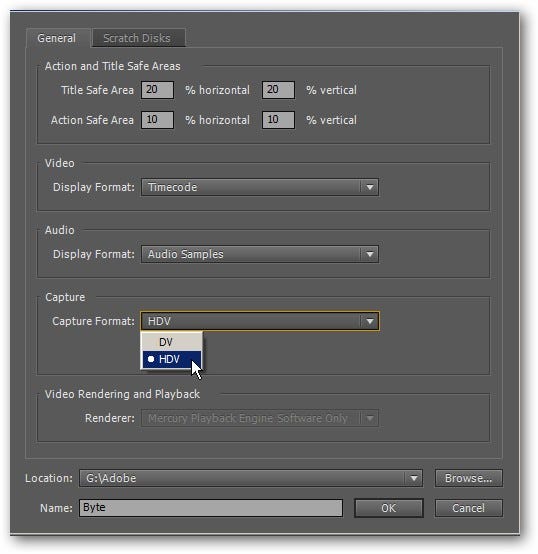
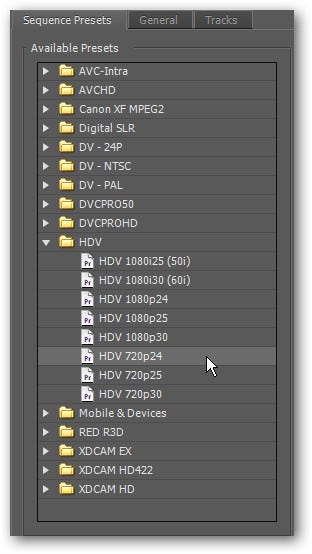
Make a new project. For high-definition movies select HDV; otherwise, just select DV.
In the next screen, you'll need to pick a preset. For most movies, 720p24 will work; that means 720 pixels progressively scanned at 24 frames a second. That's better than most YouTube videos. It's high quality with a reasonable file size--a good compromise for multiple file formats and great for most editing environments. Also, using 24 (actually 23.97) frames per second will eliminate any issues with dropped frames--for instance, if one source was recorded at 30 frames per second, another at 60, and another at 25, there are going to be problems if you import at 30 frames per second.
Before moving forward, click the "General" tab and select "Maximum bit depth" and "Maximum render quality."

When this dialog box appears, click "OK."
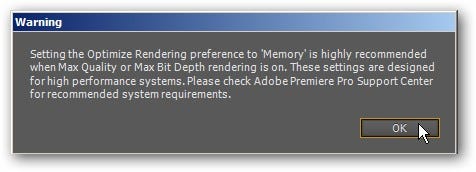
If your editing environment has more than 2 GB RAM, select "Edit--Preferences--Memory" and select "Optimize rendering for: Memory."

Select the files you converted via "File--Import" and perform your editing.
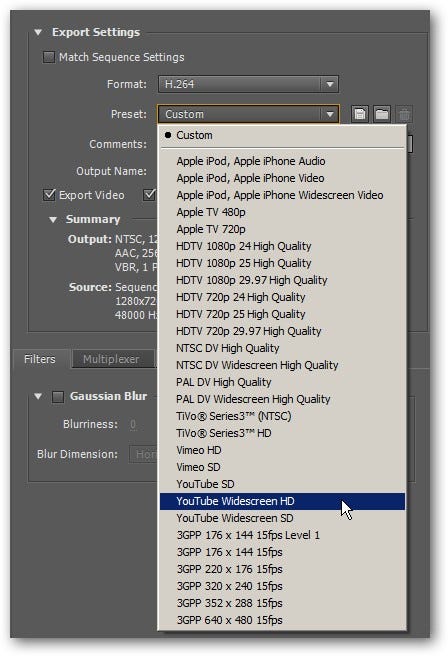
When it's time to export, select "File--Export--To Media." For YouTube and most other Flash-based Web video, the preset for YouTube widescreen HD is best.
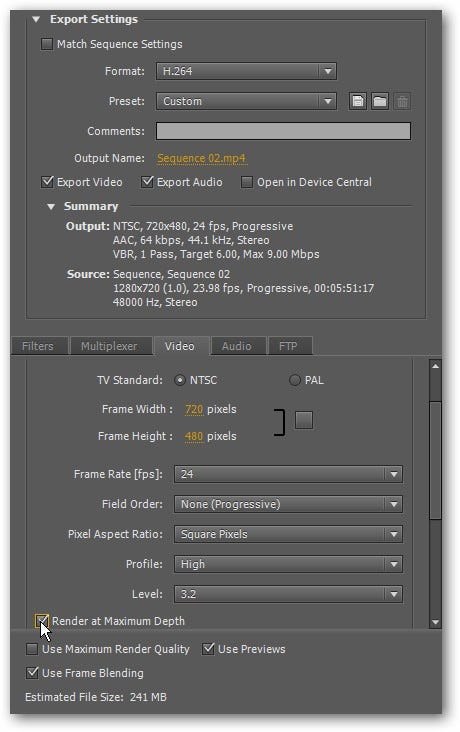
Select the "Video" tab, scroll down, and select "Render at Maximum Depth." Also select "Use Maximum Render Quality."
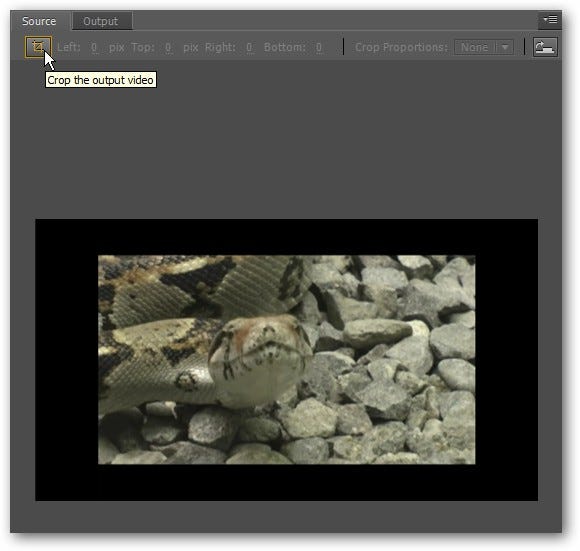
Finally, crop the video with the crop tool. Make sure to set the crop proportions to something that's appropriate for the video you're working with.
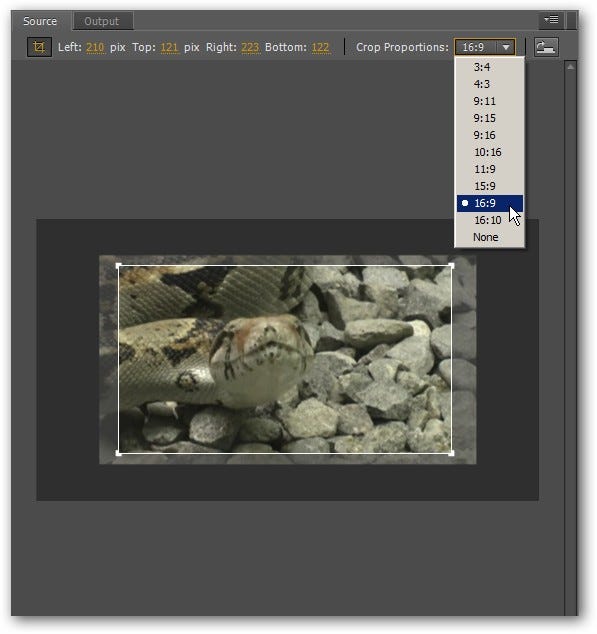
Select the appropriate aspect ratio for the motion picture size. When in doubt, crop. The first number is width, the second height. 16:9 is a standard size appropriate for YouTube. 4:3 is more appropriate for standard-definition television sets.
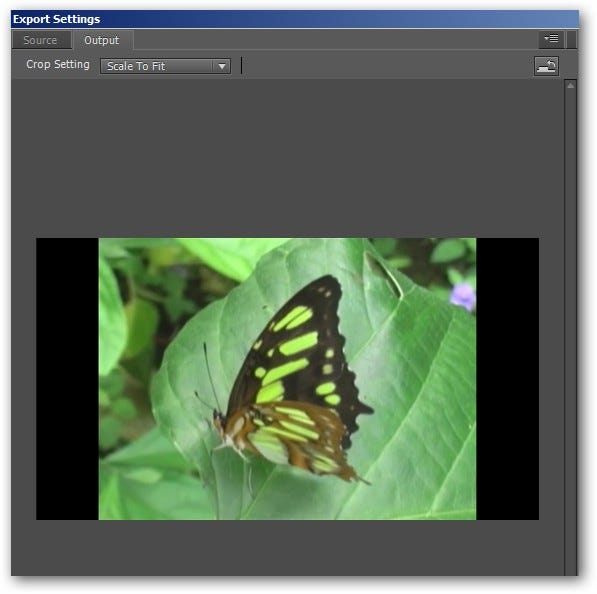
Click the "Output" tab to verify your work before you encode the video.
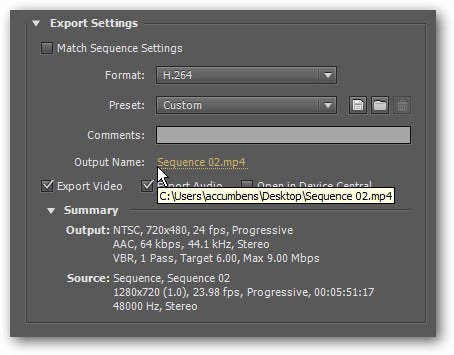
Verify your export settings and destination. Adobe Premiere defaults to exporting to the desktop. Once verified, press the "Queue" button.
The Export function renders the movie with Adobe Media Encoder, which is designed to run in the background but will still use a fair amount of system resources.
Max Cherney is a Senior Contributor and technologist at BYTE. Follow him on Twitter @chernandburn. Got an idea? Send it to Max at [email protected].
About the Author(s)
You May Also Like
More Insights
Editor's Choice


May 2, 2024
While there are plentiful options in cyber resiliency and business continuity tools and platforms, there isn’t one that can knock out everything from sudden cloud outages to prolonged ransomware attacks in a single punch. What can you do to keep the company on its feet no matter what is thrown at it? Find out in this new virtual event.
Reserve Your Seat Now